
The world of SwiftUI is consistently evolving, with every replace pushing the boundaries of app growth. With iOS 18, the enhancements are each thrilling and vital, set to remodel how builders have interaction with SwiftUI.
This information goals to discover each new characteristic and enchancment on this model, providing a complete overview of the modifications.
The Floating Tab Bar
The Tab view in SwiftUI has been significantly enhanced with the addition of a floating tab bar. This new characteristic can seamlessly transition right into a sidebar, offering customers with an intuitive option to entry the total performance of an app.
On iPad, customers can now faucet a sidebar button on the tab bar to remodel the tab bar into sidebar. For builders, it’s only a line of code if you wish to assist this characteristic. All you want is to set the tab view type to .sidebarAdaptable:
struct ContentView: View {
    @State var customization = TabViewCustomization()

    var physique: some View {
        TabView {
            Tab("House", systemImage: "home.fill") {

            }

            Tab("Bookmark", systemImage: "bookmark.circle.fill") {

            }

            Tab("Movies", systemImage: "video.circle.fill") {

            }

            Tab("Profile", systemImage: "particular person.crop.circle") {

            }

            Tab("Settings", systemImage: "gear") {

            }

        }
        .tint(.yellow)
        .tabViewStyle(.sidebarAdaptable)
        .tabViewCustomization($customization)
    }
}
As soon as the choice is about, customers can effortlessly swap between a sidebar and a tab bar, enhancing navigation flexibility. Moreover, the brand new tab bar provides in depth customization. By attaching the .tabViewCustomization modifier to the Tab view, customers can tailor the menu objects of the tab bar.
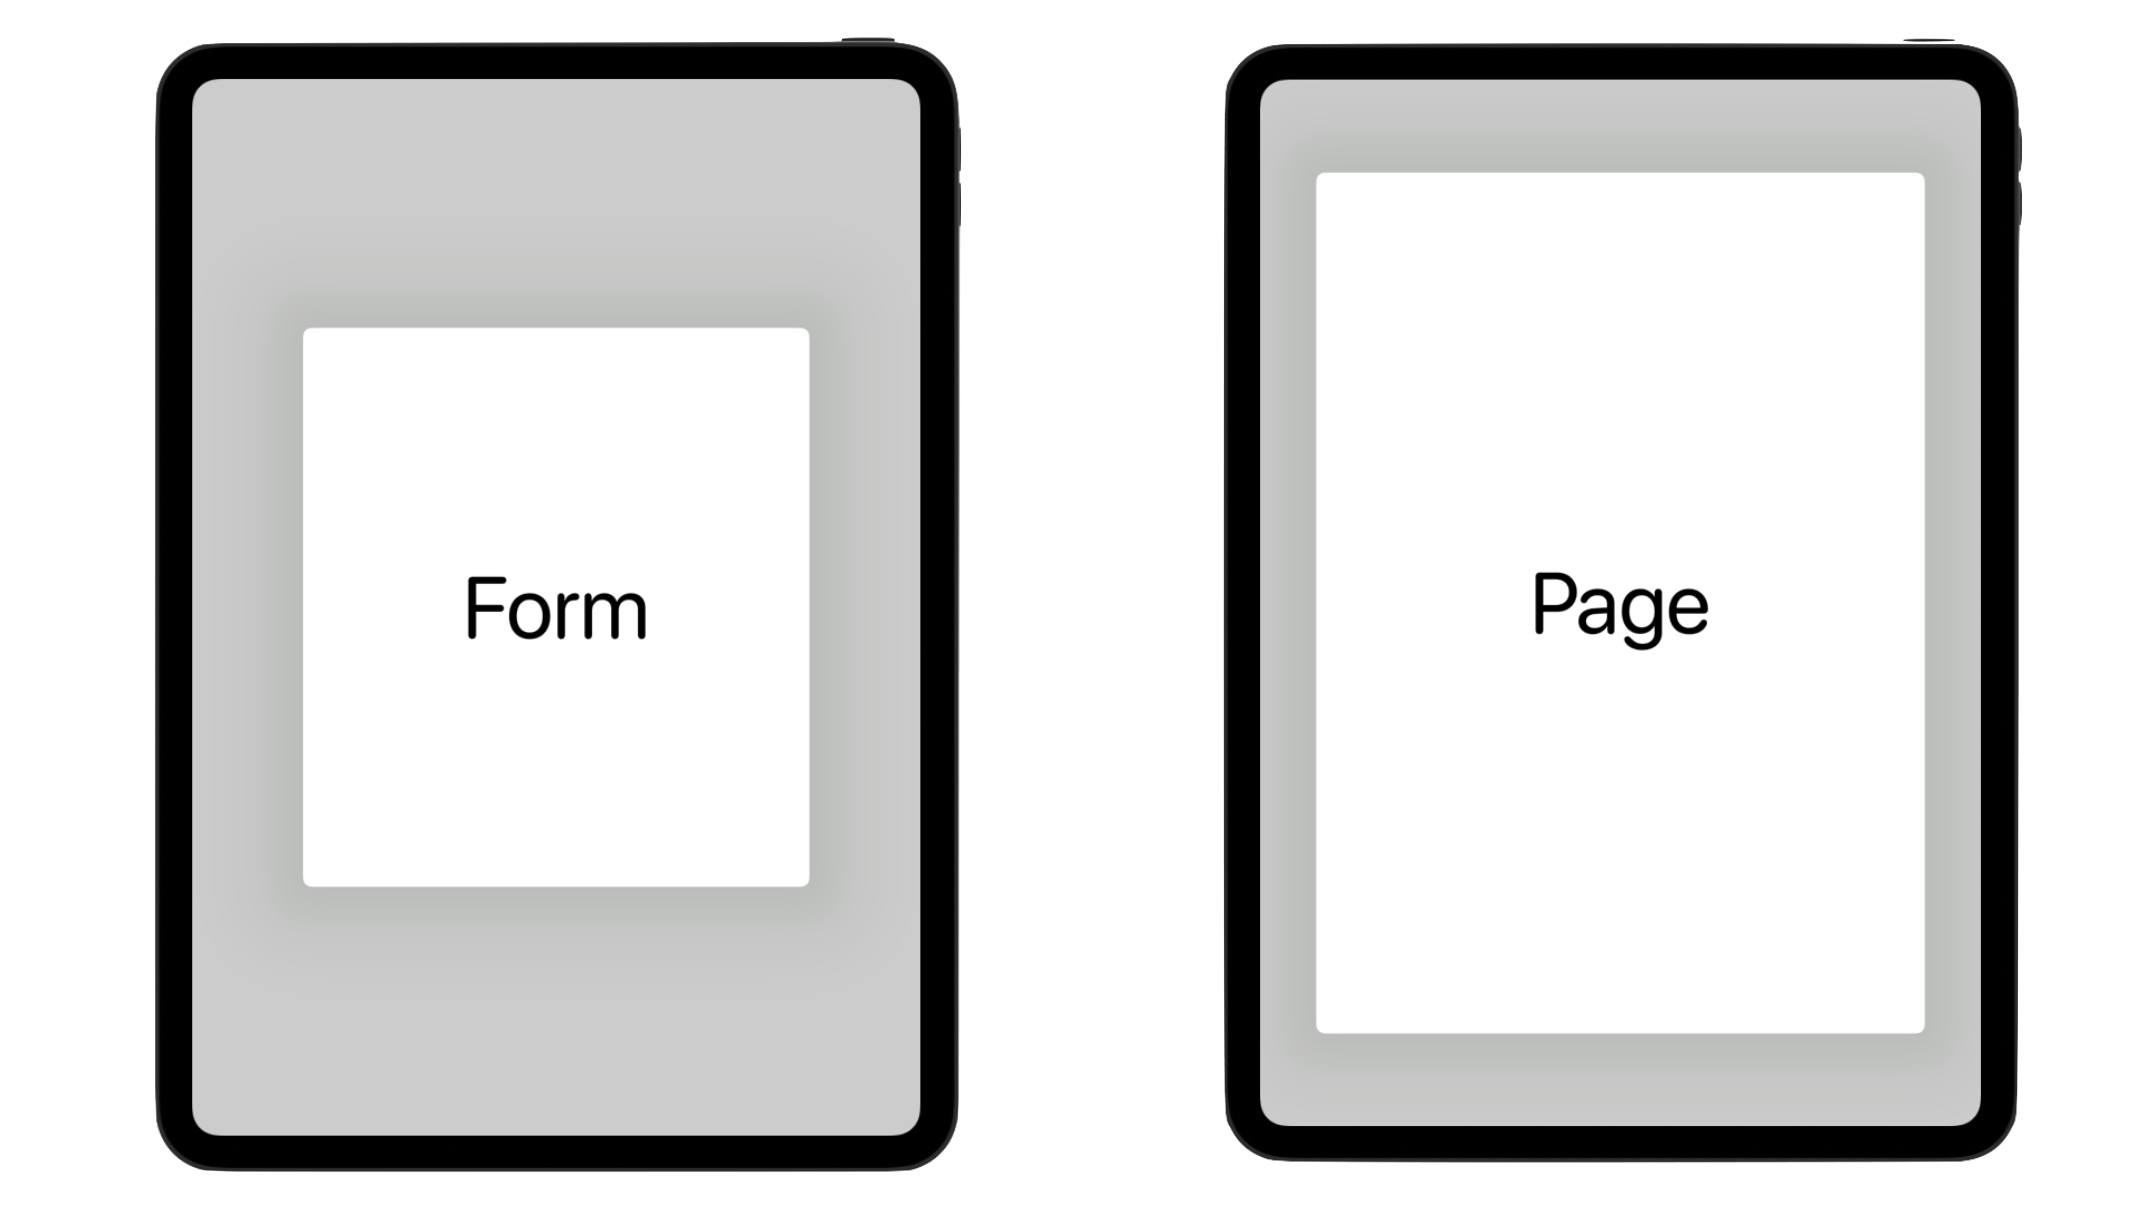
Sheet Presentation Sizing
Sheet presentation sizing is now constant and streamlined throughout platforms. Through the use of the .presentationSizing modifier, you’ll be able to simply create sheets with supreme dimensions utilizing presets reminiscent of .type or .web page, and even specify customized sizes. Here’s a pattern:
struct PresentationSizingDemo: View {

    @State non-public var showSheet = false

    var physique: some View {
        Button {
            showSheet.toggle()
        } label: {
            Textual content("Present sheet")
        }
        .sheet(isPresented: $showSheet) {
            Textual content("It is a fast demo of presentation sizing.")
                .presentationSizing(.type)
        }
    }
}
On iPad, the .type preset shows a smaller sheet in comparison with .web page. Nonetheless, there is no such thing as a dimension distinction on iPhone.
Coloration Mesh Gradients
SwiftUI now provides in depth assist for colourful mesh gradients. The brand new MeshGradient characteristic means that you can create two-dimensional gradients utilizing a grid of positioned colours. By combining management factors and colours, you’ll be able to design all kinds of gradient results.
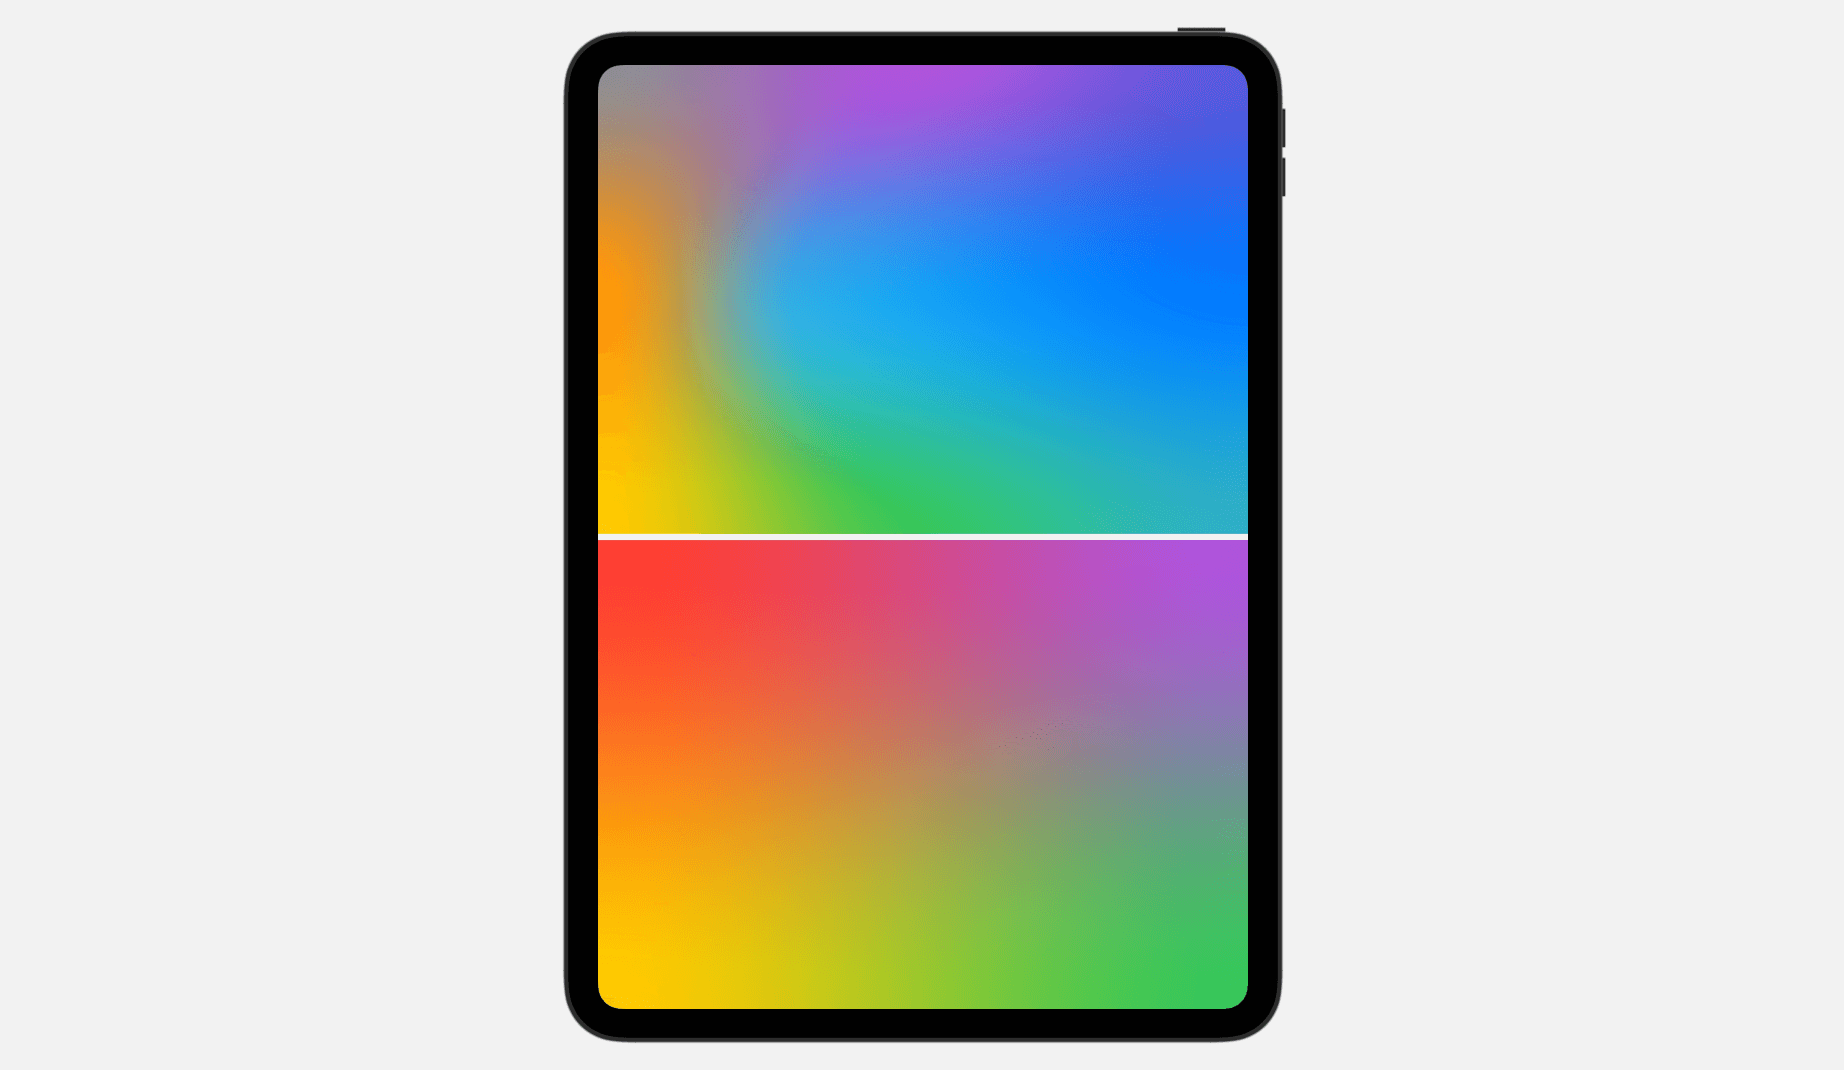
Beneath exhibits a few gradients created utilizing MeshGradient:
struct ColorMeshDemo: View {
    var physique: some View {
        VStack {
            MeshGradient(
                width: 3,
                peak: 3,
                factors: [
                    .init(0, 0), .init(0.5, 0), .init(1, 0),
                    .init(0, 0.5), .init(0.3, 0.5), .init(1, 0.5),
                    .init(0, 1), .init(0.5, 1), .init(1, 1)
                ],
                colours: [
                    .gray, .purple, .indigo,
                    .orange, .cyan, .blue,
                    .yellow, .green, .teal
                ]
            )

            MeshGradient(
                width: 2,
                peak: 2,
                factors: [
                    .init(0, 0), .init(1, 0),
                    .init(0, 1), .init(1, 1)
                ],
                colours: [
                    .red, .purple,
                    .yellow, .green
                ]
            )
        }
        .ignoresSafeArea()
    }
}
Zoom Transition
SwiftUI now has the built-in assist of zoom transition. You should use the .matchedTransitionSource modifier to simply render the zoom transition.
In the event you’re conversant in utilizing matchedGeometryEffect, you may discover matchedTransitionSource fairly related. Beneath is pattern code we wrote to create the zoom transition proven above:
struct ZoomTransitionDemo: View {
    let samplePhotos = (1...20).map { Photograph(identify: "coffee-($0)") }

    @Namespace() var namespace

    var physique: some View {
        NavigationStack {
            ScrollView {
                LazyVGrid(columns: [ GridItem(.adaptive(minimum: 150)) ]) {

                    ForEach(samplePhotos) { photograph in
                        NavigationLink {
                            Picture(photograph.identify)
                                .resizable()
                                .navigationTransition(.zoom(sourceID: photograph.id, in: namespace))
                        } label: {
                            Picture(photograph.identify)
                                .resizable()
                                .scaledToFill()
                                .body(minWidth: 0, maxWidth: .infinity)
                                .body(peak: 150)
                                .cornerRadius(30.0)
                        }
                        .matchedTransitionSource(id: photograph.id, in: namespace)

                    }
                }
            }
        }
        .padding()
    }
}
The matchedTransitionSource modifier is utilized to a NavigationLink with a particular photograph ID, designating the view because the supply of the navigation transition. For the vacation spot view, which can also be an Picture view, the navigationTransition modifier is used to render the zoom transition.
Extra Animations for SF Symbols 6
iOS 17 launched a implausible assortment of expressive animations for SF Symbols. Builders can leverage these animations utilizing the brand new symbolEffect modifier. iOS 18 pushes the SF Symbols to model 6 with an excellent wider number of animated symbols for builders to make the most of of their apps.
Here’s a pattern code snippet for the brand new rotate animation:
Picture(systemName: "ellipsis.message")
            .font(.system(dimension: 300))
            .symbolRenderingMode(.palette)
            .foregroundStyle(.purple, .grey)
            .symbolEffect(.rotate, worth: animate)
            .onTapGesture {
                animate.toggle()
            }
On prime of the rotate animation, SF Symbols 6 additionally supplies two different forms of animation together with .wiggle and .breathe.
Enhancements of SwiftUI Charts
The SwiftUI Charts framework now helps vectorized and performance plots. For instance, let’s say you wish to plot a graph for the next perform:
y = x^2You should use LinePlot to plot the graph like this:
Chart {
    LinePlot(x: "x", y: "y") { x in
        return pow(x, 2)
    }
    .foregroundStyle(.inexperienced)
    .lineStyle(.init(lineWidth: 10))
}
.chartXScale(area: -4...4)
.chartYScale(area: -4...4)
.chartXAxis {
    AxisMarks(values: .computerized(desiredCount: 10))
}
.chartYAxis {
    AxisMarks(values: .computerized(desiredCount: 10))
}
.chartPlotStyle { plotArea in
    plotArea
        .background(.yellow.opacity(0.02))
}
You’ll be able to merely present the perform to a LinePlot to graph a perform.

The brand new model of SwiftUI delivers a strong set of recent APIs that give builders fine-grained management over their scroll views. The introduction of the onScrollGeometryChange modifier means that you can maintain observe with the state of scroll views. This new functionality allows you to effectively react to modifications within the scroll view’s content material offsets, content material dimension, and different scroll-related properties.
Here is a pattern code snippet that demonstrates how you should utilize this modifier to show a “Scroll to Prime” button after the consumer has scrolled down an inventory:
struct ScrollViewDemo: View {

    let samplePhotos = (1...20).map { Photograph(identify: "coffee-($0)") }

    @State non-public var showScrollToTop = false

    var physique: some View {
        ScrollView {
            VStack {
                ForEach(samplePhotos) { photograph in
                    Picture(photograph.identify)
                        .resizable()
                        .scaledToFill()
                        .body(peak: 200)
                        .clipShape(RoundedRectangle(cornerRadius: 15))
                }
            }
        }
        .padding(.horizontal)
        .overlay(alignment: .backside) {
            if showScrollToTop {
                Button("Scroll to prime") {

                }
                .controlSize(.extraLarge)
                .buttonStyle(.borderedProminent)
                .tint(.inexperienced)
            }
        }
        .onScrollGeometryChange(for: Bool.self) { geometry in
            geometry.contentOffset.y < geometry.contentInsets.backside + 200

        } motion: { oldValue, newValue in
            withAnimation {
                showScrollToTop = !newValue
            }
        }

    }
}
The geometry of a scroll view modifications often whereas scrolling. We are able to leverage the onScrollGeometryChange modifier to seize the replace and show the “Scroll to prime” button accordingly.
SwiftUI additionally introduces the onScrollVisibilityChange modifier for views inside a scroll view. This modifier means that you can detect when a selected view turns into seen and carry out particular actions in response.
Suppose we’ve got a Rectangle view on the finish of a scroll view and we wish to set off a coloration change animation solely when this view comes into view. We are able to use the onScrollVisibilityChange modifier to detect when the view turns into seen and when it goes off-screen.
Rectangle()
    .fill(coloration)
    .body(peak: 100)
    .onScrollVisibilityChange(threshold: 0.9) { seen in
        withAnimation(.linear(length: 5)) {
            coloration = seen ? .inexperienced : .blue
        }
    }
You now have the flexibility to design customized resizable controls, like buttons and toggles, which will be positioned within the Management Heart or on the lock display screen. Controls are a brand new form of Widget that which might be simple to construct with App Intents.
To create a management widget in Management Heart, you undertake the ControlWidget protocol and supply the implementation. Here’s a pattern code supplied by Apple:
struct StartPartyControl: ControlWidget {
    var physique: some ControlWidgetConfiguration {
        StaticControlConfiguration(
            form: "com.apple.karaoke_start_party"
        ) {
            ControlWidgetButton(motion: StartPartyIntent()) {
                Label("Begin the Get together!", systemImage: "music.mic")
                Textual content(PartyManager.shared.nextParty.identify)
            }
        }
    }
}
We are going to additional look into management widgets in a separate tutorial.
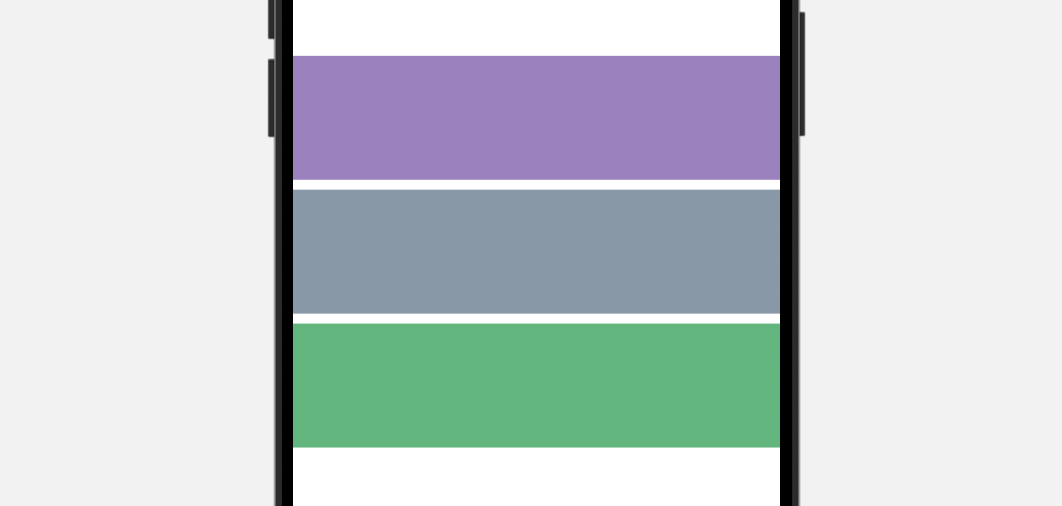
A brand new Combine Modifier for Coloration
Now you can mix two totally different colours to create your required hue by utilizing the brand new combine modifier. Right here is an instance:
VStack {
    Coloration.purple.combine(with: .inexperienced, by: 0.3)
        .body(peak: 100)

    Coloration.purple.combine(with: .inexperienced, by: 0.5)
        .body(peak: 100)

    Coloration.purple.combine(with: .inexperienced, by: 0.8)
        .body(peak: 100)
}
Merely present the combine modifier with the colour to mix and the mix ratio. SwiftUI will then generate the brand new coloration based mostly on these parameters.
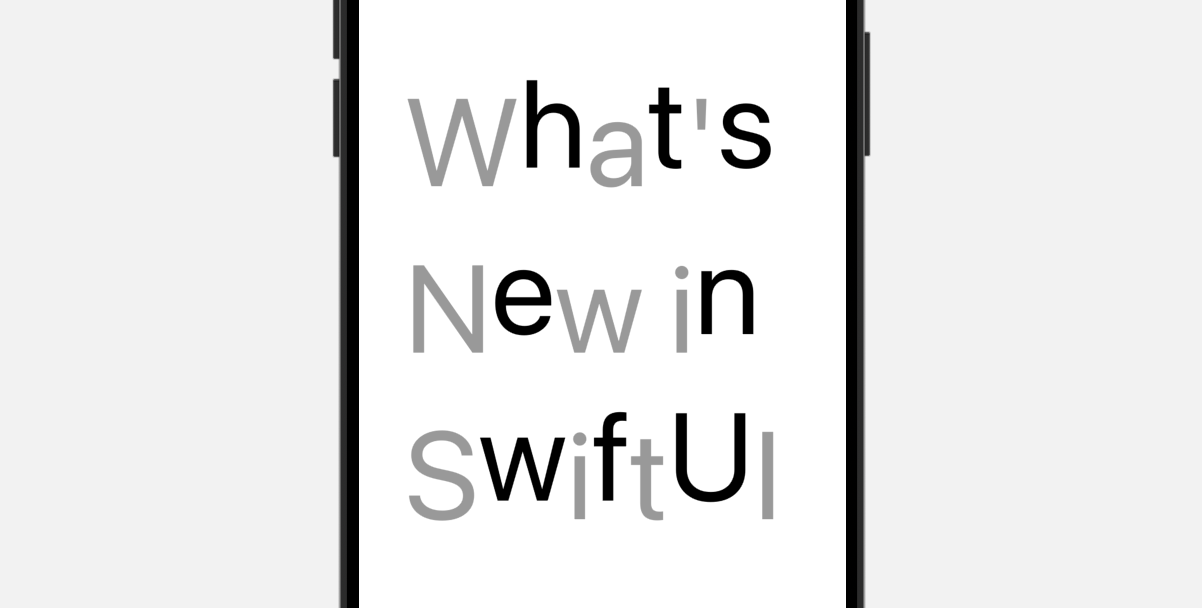
Visible Results for Textual content
Now you can prolong SwiftUI Textual content views with customized rendering results by adopting the TextRenderer. Here’s a pattern textual content renderer:
struct CustomTextRenderer: TextRenderer {

    func draw(structure: Textual content.Format, in context: inout GraphicsContext) {

        for line in structure {
            for (index, slice) in runs.enumerated() {
                context.opacity = (index % 2 == 0) ? 0.4 : 1.0
                context.translateBy(x: 0, y: index % 2 != 0 ? -15 : 15)

                context.draw(slice)
            }
        }
    }
}

struct TextAnimationDemo: View {
    var physique: some View {
        Textual content("What's New in SwiftUI")
            .font(.system(dimension: 100))
            .textRenderer(CustomTextRenderer())
    }
}
By implementing the draw methodology, you’ll be able to customise the visible impact of every character.
Abstract
The iOS 18 replace introduces a number of serious enhancements to SwiftUI. This tutorial provides a concise introduction to a few of the new options. For extra advanced options, we will probably be creating detailed, standalone tutorials to completely discover their functions and advantages. Make sure you keep tuned for these upcoming in-depth guides.

