
With the discharge of Xcode 15, Apple launched an thrilling characteristic referred to as String Catalogs. This characteristic goals to streamline the localization course of in your app, making it simpler to handle all of your strings in a single central location. By leveraging String Catalogs, you’ll be able to be certain that your app is totally localized earlier than it reaches your customers. This new characteristic provides each comfort and confidence within the localization course of.
In earlier variations of Xcode, it’s a must to undergo a string internationalization course of that requires to change the prevailing texts with the String(localized:) macro earlier than localization. Nevertheless, with the introduction of String Catalogs, this course of is now not vital. For SwiftUI tasks, String Catalogs mechanically extracts all user-facing texts for you, eliminating the necessity for guide modifications.
Let’s create a easy venture and see how String Catalogs can simplify the localization course of in your SwiftUI app tasks.
Constructing a Easy Demo for Localization
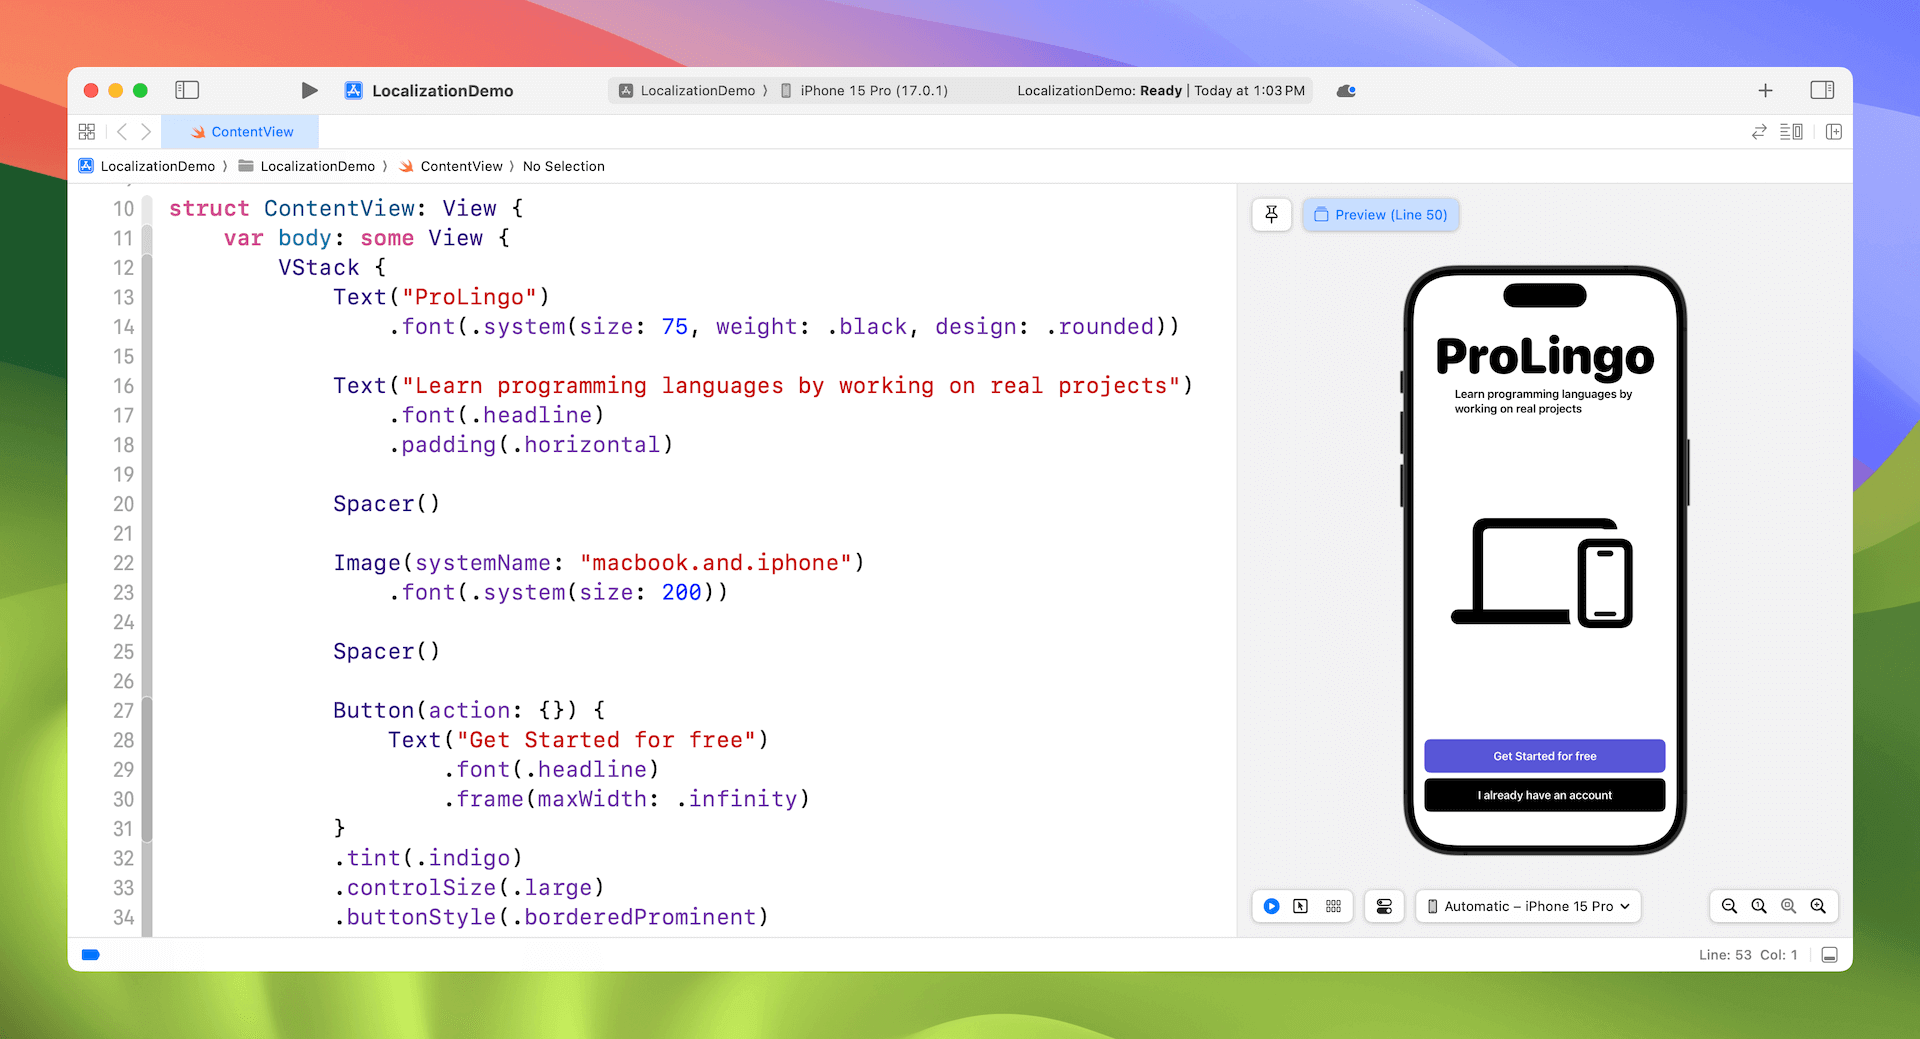
Assuming you’ve put in Xcode 15, create a brand new SwiftUI venture and exchange the code in ContentView like this:
struct ContentView: View {
    var physique: some View {
        VStack {
            Textual content("ProLingo")
                .font(.system(dimension: 75, weight: .black, design: .rounded))

            Textual content("Be taught programming languages by engaged on actual tasks")
                .font(.headline)
                .padding(.horizontal)

            Spacer()

            Picture(systemName: "macbook.and.iphone")
                .font(.system(dimension: 200))

            Spacer()

            Button(motion: {}) {
                Textual content("Get Began at no cost")
                    .font(.headline)
                    .body(maxWidth: .infinity)
            }
            .tint(.indigo)
            .controlSize(.giant)
            .buttonStyle(.borderedProminent)

            Button(motion: {}) {
                Textual content("I have already got an account")
                    .font(.headline)
                    .body(maxWidth: .infinity)
            }
            .tint(.black)
            .controlSize(.giant)
            .buttonStyle(.borderedProminent)

        }
        .padding()
    }
}
It’s a quite simple login display screen for demo function. If you happen to’ve written the code above, Xcode ought to present you the pattern login display screen within the preview pane.
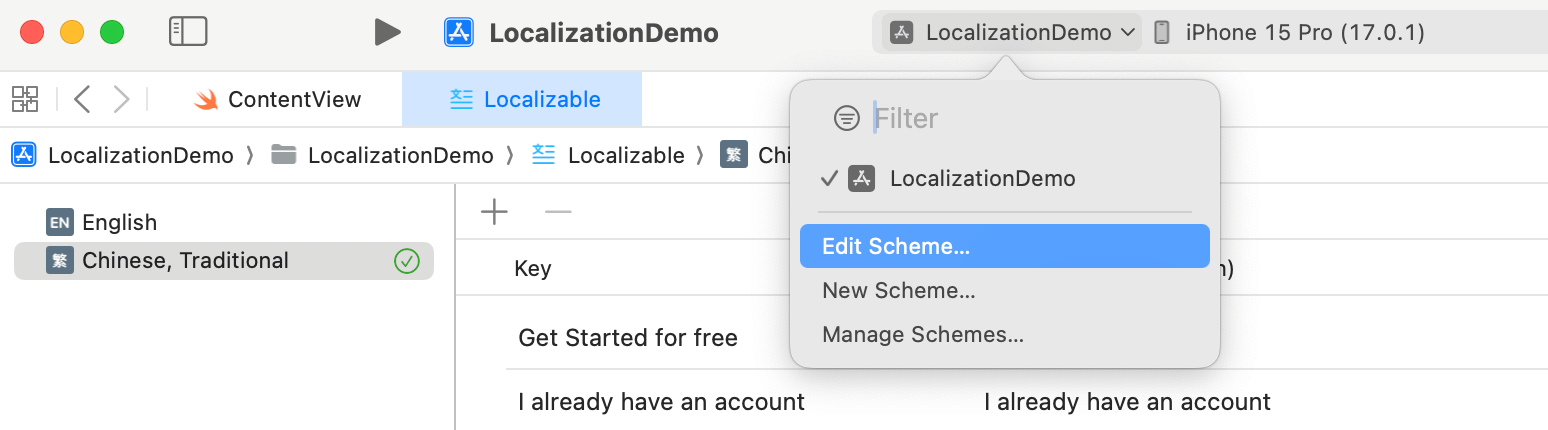
Utilizing String Catalogs
By default, Xcode tasks are configured to help solely the English language. If you wish to add help for an extra language, first choose the venture file within the venture navigator. Then go to the Information tab and find the Localizations part. Click on the “+” button so as to add a brand new language. Subsequent, select your required language, reminiscent of conventional Chinese language, from the obtainable choices.
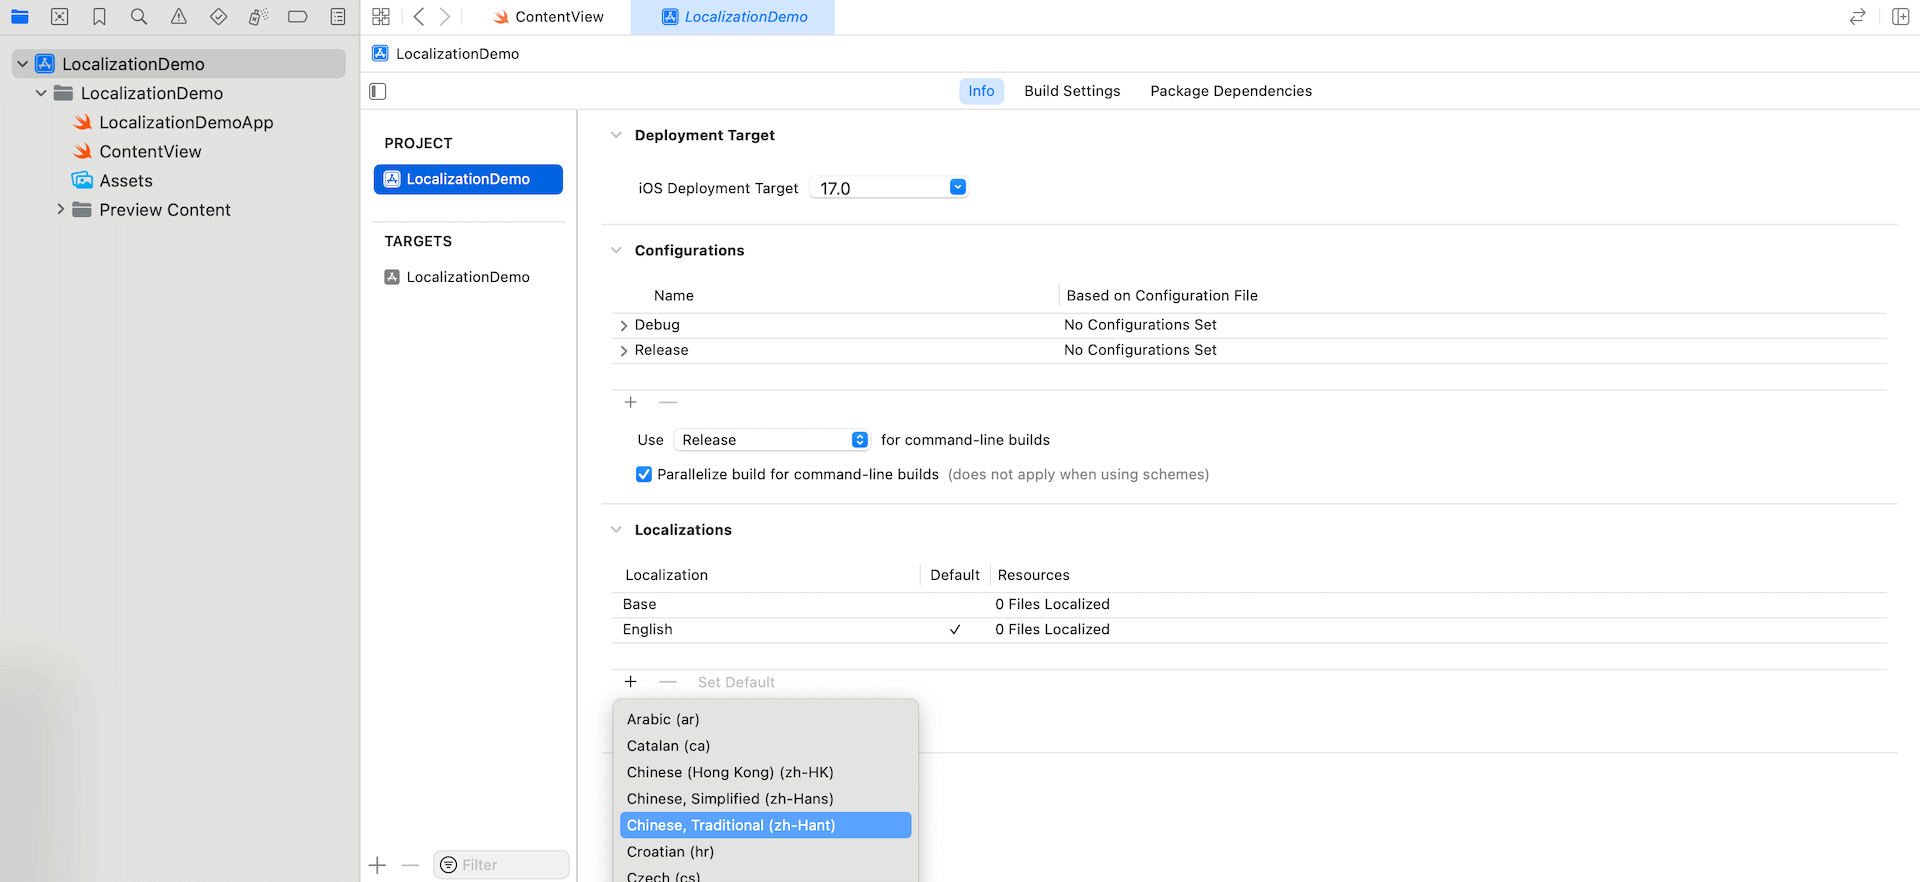
When you’ve accomplished these steps, your Xcode venture may have help for the chosen language, permitting for localization.
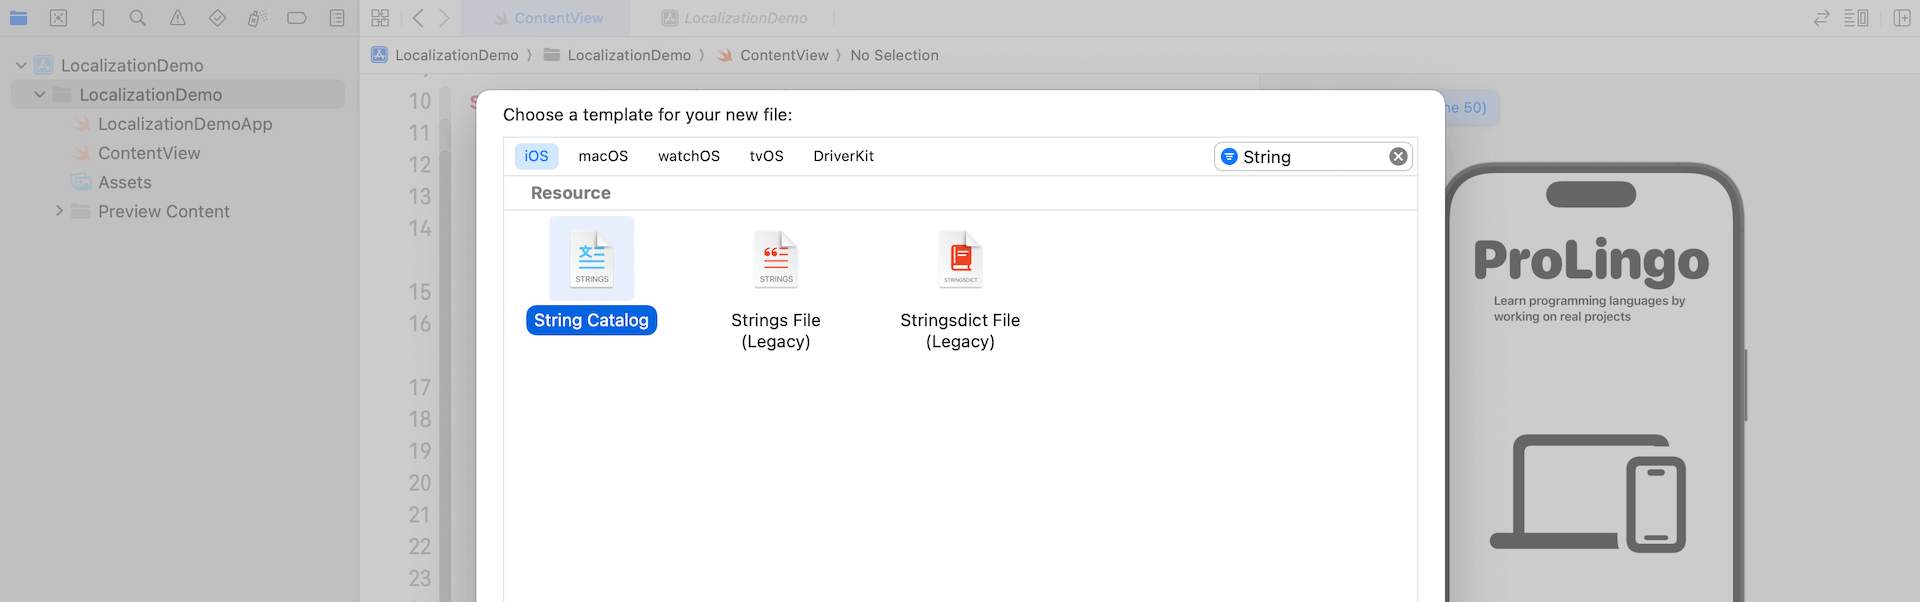
The String Catalog file shouldn’t be bundled within the Xcode venture. Earlier than localization, it’s a must to manually create a String Catalog file. Within the venture navigator, right-click the venture folder and choose “New File…”. Underneath the iOS class, search for the String Catalog template. Click on Subsequent to proceed after which title the file Localizable.
This course of generates an empty Localizable file that features all of the supported languages in your app. To extract all of the user-facing texts into this file, you’ll be able to comply with these steps: choose Product from the Xcode menu and select Construct to rebuild the venture. After the construct course of, Xcode will mechanically extract all of the textual content and populate them within the Localizable file.
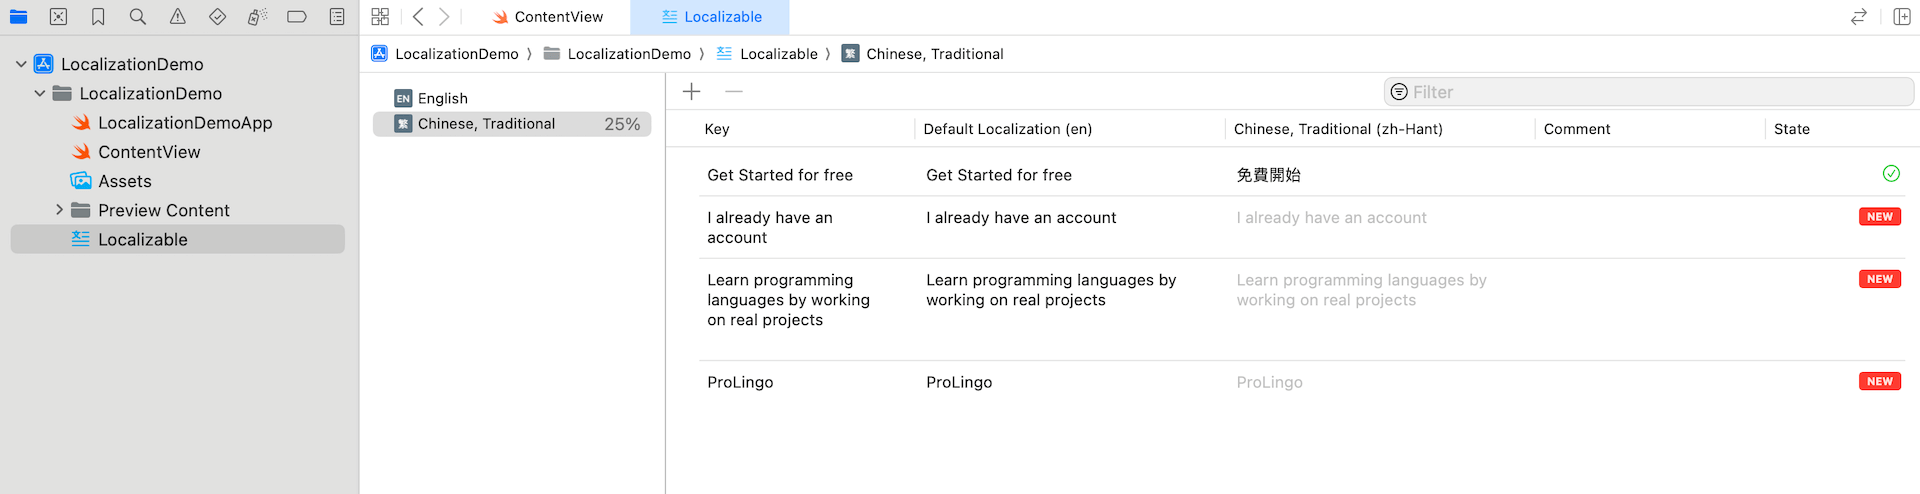
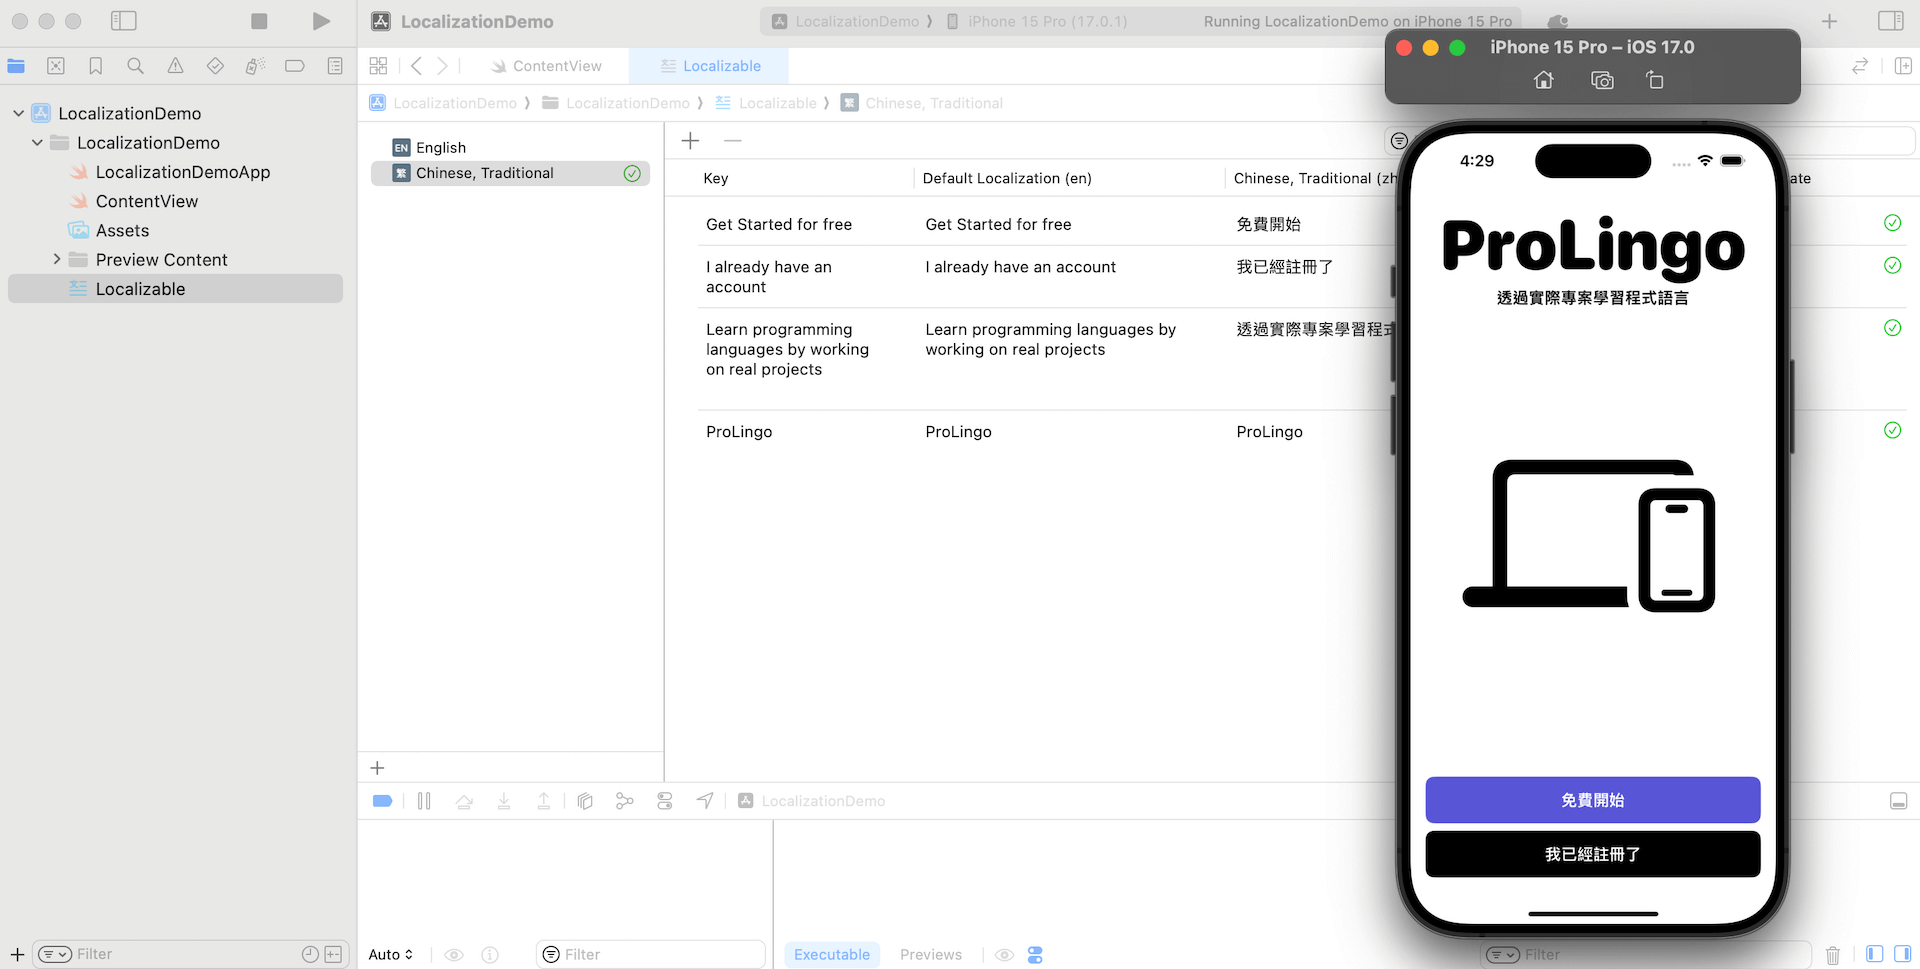
As soon as the texts are extracted, you’ll be able to proceed so as to add translations straight within the String Catalog file for every language. This lets you present localized variations of the textual content and make sure the app is correctly localized for various languages.
While you add new user-facing textual content in your venture, Xcode will mechanically embrace them within the String Catalog. This course of happens each time you construct the venture. It ensures that the newly added textual content is correctly managed and could be simply localized for various languages.
Testing the Localized App
There are a few methods to check the localization of your app. One strategy is to alter the language desire of the simulator after which run the localized app on it, permitting you to see how the app behaves in numerous languages. Another choice is to make the most of a preview characteristic in Xcode that lets you check your app in numerous languages and areas, each at runtime and in Interface Builder. Let’s discover these choices intimately.
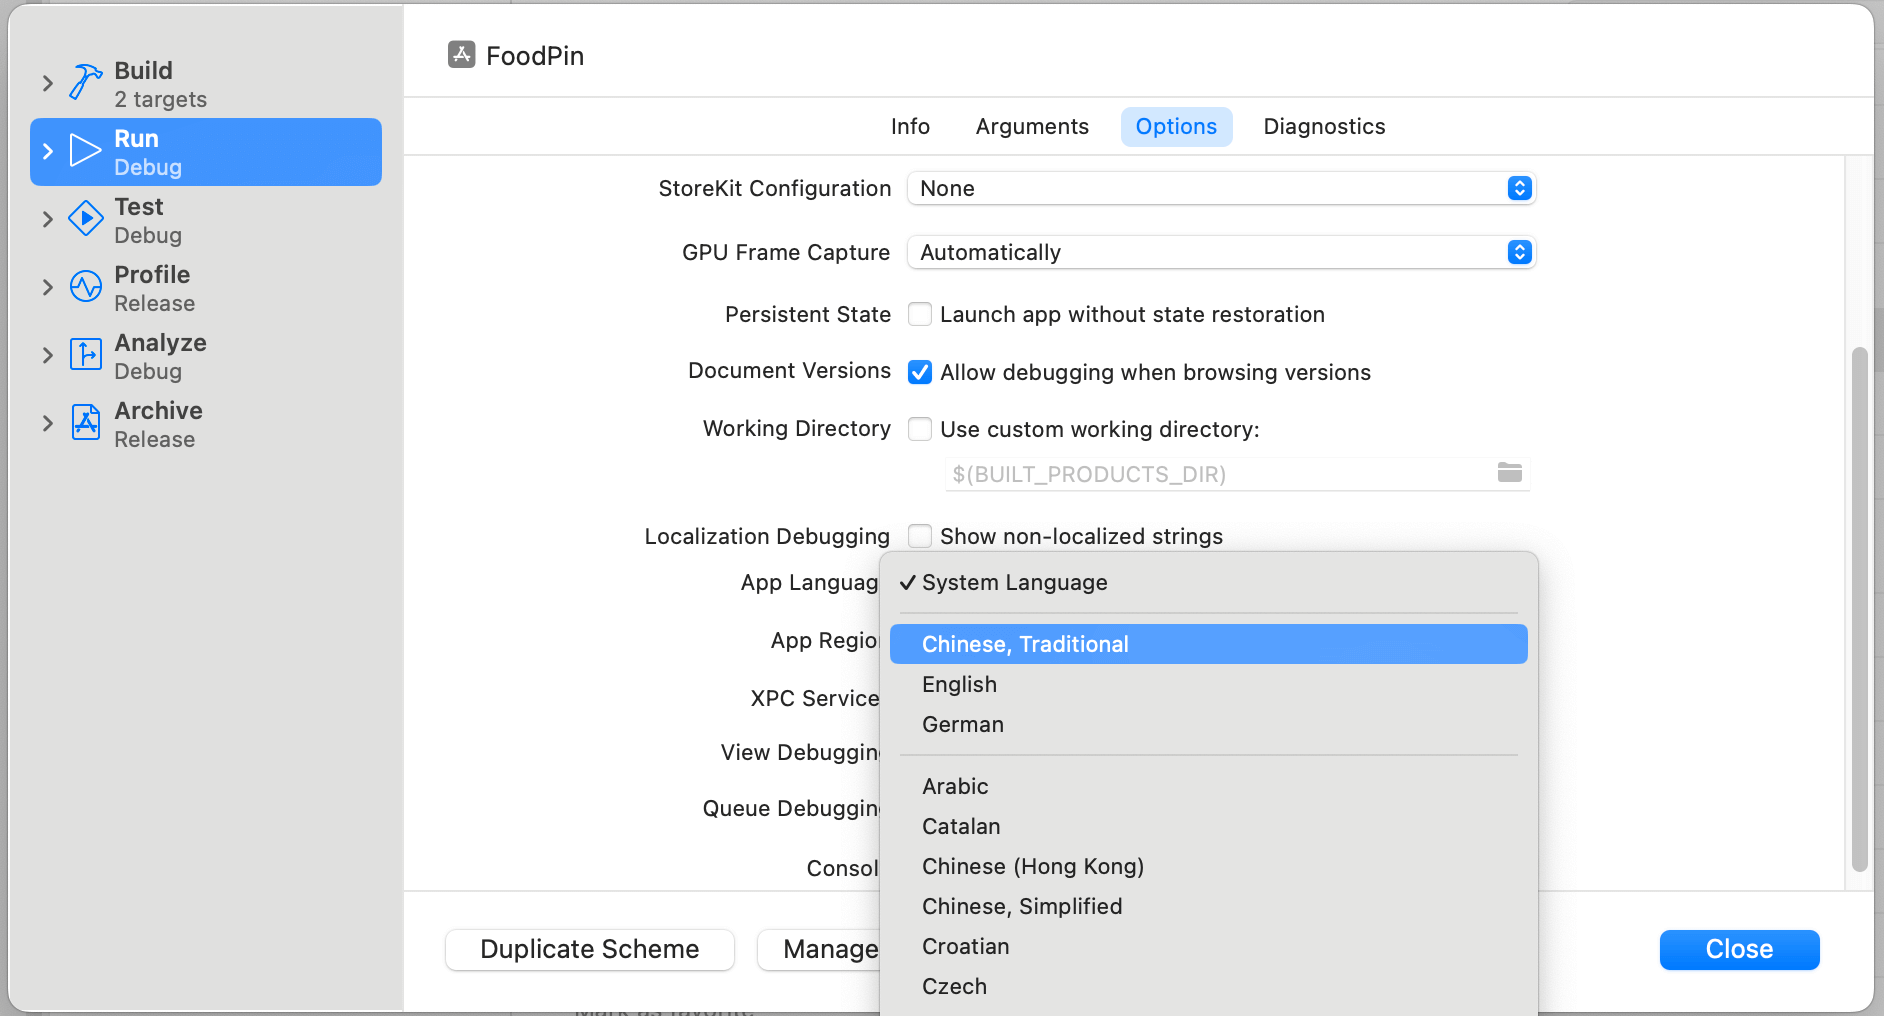
To allow the preview at runtime characteristic in Xcode, you’ll be able to modify the scheme sheet. Inside the scheme settings, you’ll be able to set your most popular language within the dialog field, permitting you to preview how the app seems and features in that particular language.
Within the dialog field, choose Run > Choices and alter the App language to your most popular language. For instance, Chinese language (Conventional). Click on the Shut button to avoid wasting the setting.
Now click on the Run button to launch the app; the language of the simulator ought to set to your most popular language. If you happen to’ve set it to Chinese language/German, your app ought to appear like the screenshot.
Testing the Localization Utilizing Preview
To preview the localization of a SwiftUI app, you’ll be able to make the most of the locale surroundings variable in your preview code. This lets you simulate the app UI in numerous languages. For instance, in case you want to preview the app UI in Conventional Chinese language, you’ll be able to add an extra preview code block with the specified locale settings. Right here’s an instance:
#Preview("Conventional Chinese language") {
    ContentView()
        .surroundings(.locale, .init(identifier: "zh-Hant"))
}
By setting the locale surroundings variable to .init(identifier: "zh-Hant"), you’ll be able to preview the app UI with Conventional Chinese language. You possibly can modify the identifier to simulate different languages as wanted.
Including Remark to Your Textual content
Within the Localizable file, there’s a remark discipline that shows the related remark for every key and translation. If you happen to want to add feedback for a particular key, you’ll be able to embrace them when defining the Textual content view, like this:
Textual content("I have already got an account", remark: "Login button")When you modify the code with the remark, it’ll seem within the Localizable file.

Abstract
On this tutorial, I’ve guided you thru the localization course of in Xcode. The introduction of String Catalogs in Xcode 15 has considerably simplified the workflow for builders. This new characteristic automates the extraction of textual content from SwiftUI views and consolidates them right into a centralized file. Moreover, translators can conveniently edit the translations straight inside Xcode, streamlining the localization course of.
Notice: It is a pattern chapter (modified model) of the Mastering SwiftUI e book.

